Making friends with perspective - part 1
Learning perspective can feel daunting. I understand this because it was totally confusing to me at first. Now that I've learned it, it has in fact become like a friend. I may even call it, one of my greatest art tools. This is because it takes the moment of, "I don't know what's wrong with this painting, but something is" and solves the problem. I can't tell you how many times something looks off and in fact it's just because the perspective is slightly off. Countless.... You'll see in this week's lesson that just a few perspective rules can be applied to any drawing... including a still life.
|
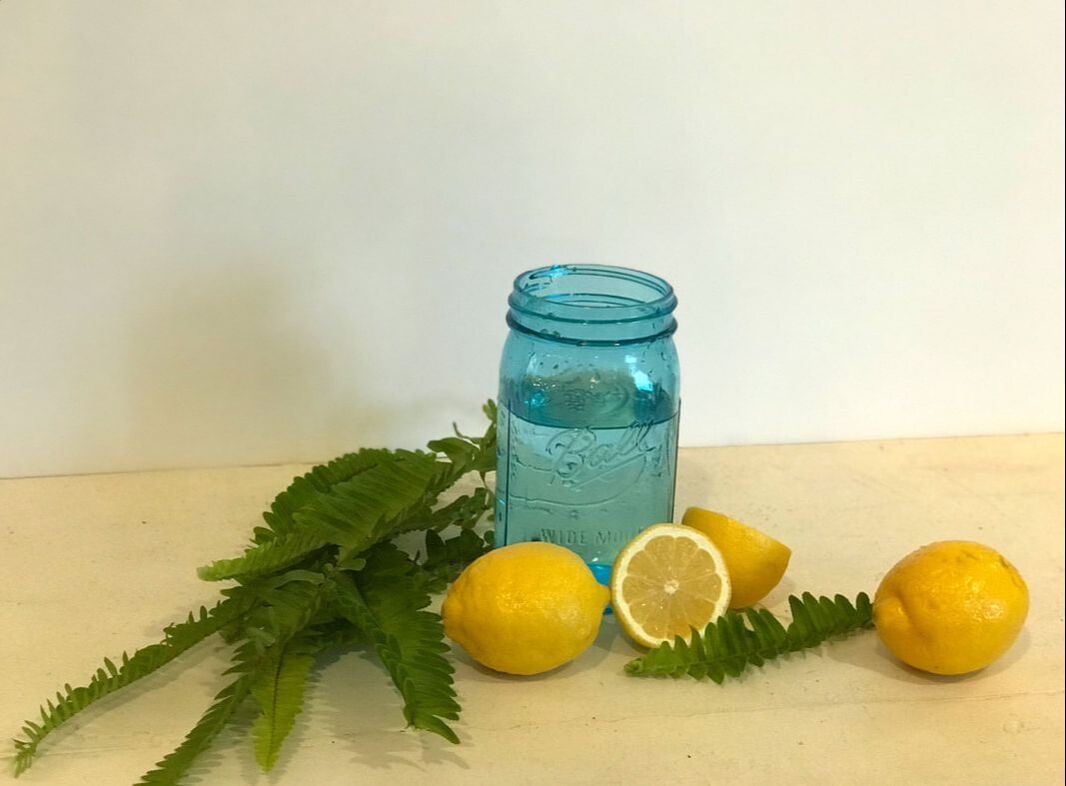
Your first step is to create your still life grouping. Select items from your kitchen for your still life that you enjoy looking at. You can use whatever you'd like to draw. I love lemons and ferns so I'm working with those. Think about your colors, textures and how the items will interact.
Remember that creating your grouping and collecting your items can be a fun and very personal experience. Look for things that make you smile. Remember this is getting turned into artwork that you may want to display or give to someone. Don't rush through this part of the exercise but instead try collecting things that relate and will work well together. |
|
Organize your objects into a grouping
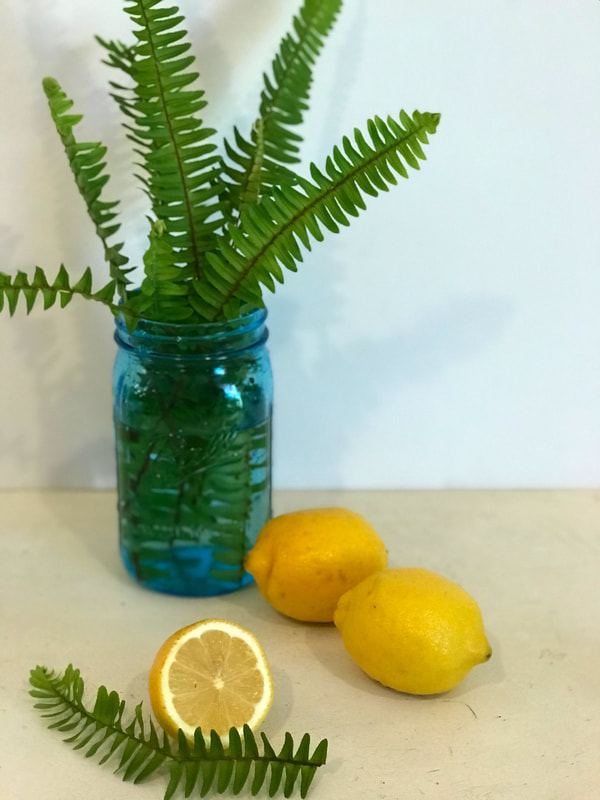
"L" shaped composition
|
Fern pointing toward the composition with a group of lemons
|
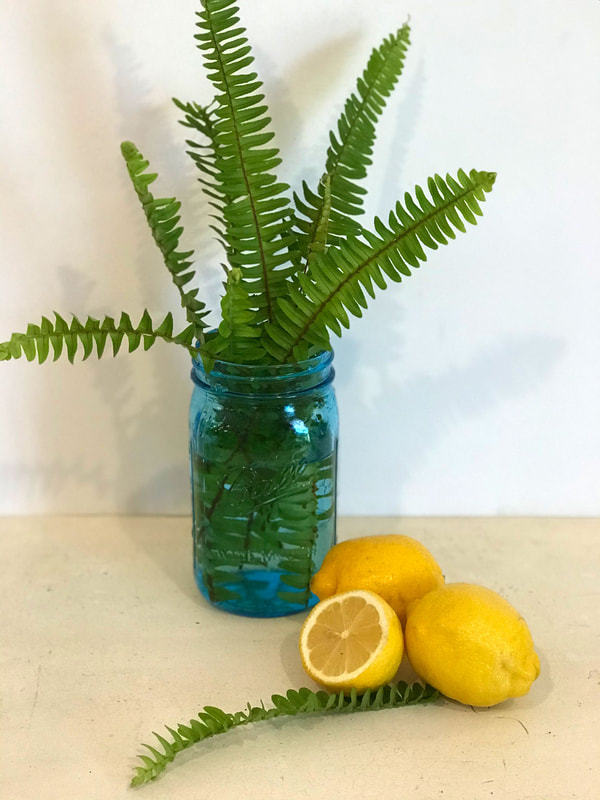
Centered mason jar with isolated lemon
|
Make some decisions about the piece before you start
Compose your grouping of objects remembering to experiment with the "L", "U" and "A" composition methods described here.
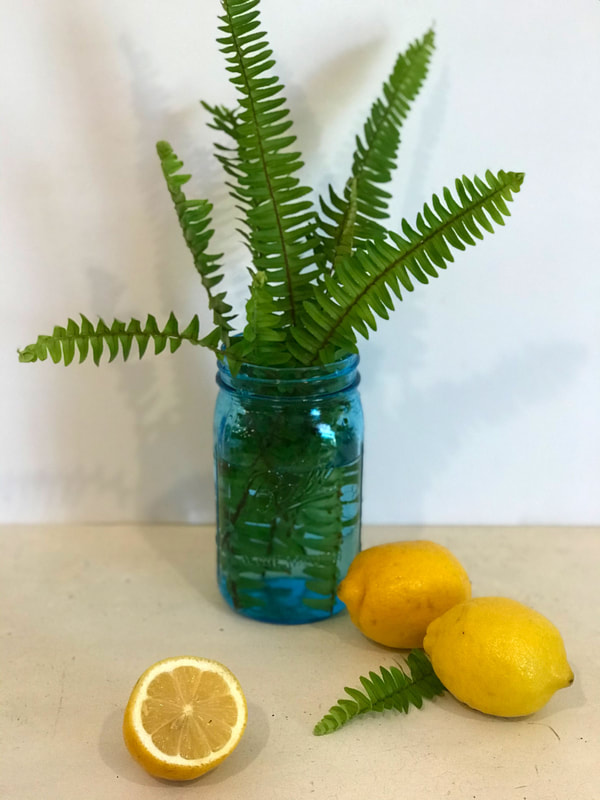
Of the options I photographed, I chose one that had the ferns and the mason jar centered with the isolated lemon and fern frond in the foreground. I cropped in on it a little bit so that objects filled the scene more. I also decided to draw the back of the fern frond so that it points back toward the rest of the grouping. We can make little fudges like that to help lead the viewer's eye around the composition. I decided that my light source will be coming from the front right. |

|
What even is a vantage point ?
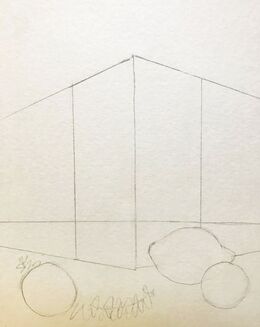
The vanishing point ( or vantage point) is a point in the far distance at which your eyes can no longer see. Since the farthest we can see is to the earth’s horizon that’s where most vantage points live... out along the scene's horizon line. Perspective lines emanate from these vantage points. One point perspective drawings use one vantage point while 2 point perspectives, use (obviously 2). For the purposes of this demonstration, we are going to use 2 vantage points. One on either side of the scene.
Note: In the example on the right, my vantage points are off of the page by about 3 to 4 inches on my drawing table.
Some Perspective Tips Before You Start
• You can use a sticky note or draw dots on your board/table for making vantage points farther apart.
• If the horizon line is at the viewer's eye level you won't see down on to the top of the object. In other words, raise your horizon line up if you want to see more of the top of your item.
• Draw lightly the boxes and lines so that you can erase the extra marks later if you want to.
• Small details on your object will use the same methods - for example:
doors and windows will follow the same rules that the walls of a building do.
• Come up with your light source and then be consistent about shading of the object. Darken the side away from the light source.
• Exaggerating the different value shades (light and dark areas) helps. Also remember that objects cast unique shadows and it makes your drawing look more believable to add them in.
* Click on the videos to see them enlarged
|
|
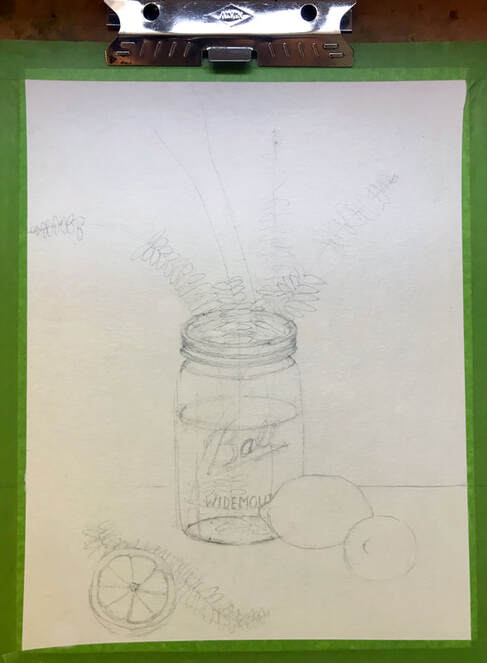
Now we are going to start the drawing process. I've detailed in the video on the left how I would tackle the initial loose drawing.
The idea is that you should first block in the placement of the objects before getting mired down in the details. They can get fleshed in later. Initially, the placement and correct perspective should be your focus to avoid having to rework things later. Think of the positioning and perspective as the building blocks to a good drawing and eventual painting. Tip: Keep all of your lines light so that they can easily be erased later. |
|
The steps I take are detailed below:
|
|
|
Now you are going to create depth by getting the back corners
|
|
|
|
Clean Up
|
Additional Tips
for if you want to draw and paint your still life in perspective:
- To think of all of your still life objects first as individual shapes. Get the shapes and perspective right first, and notice where each object overlaps or stands alone.
- Determine your light source angle while you are drawing, before you start painting so that you can further give the illusion of a realistic object.
- Don't forget to address your background and decide if it should be painted first or last. In this case it would be too challenging to paint around the palm fronds, so I'm going to do my background first but keep it light so that I can paint the fronds over it.
- Start lightly with the paint and gradually layer and build it up using repeated washes. This is the under-painting and will serve as a guide. Continuously darken the outer edges of your jars and cylindrical objects to make them look round.
For Your Homework
Compose a still life from objects in your kitchen. Make sure that one of them is a bottle, box, bowl, glass or jar so that you can practice the perspective. Now draw it out by putting your object in a cube or box. No cheating : )
The key is to get your perspective correct in your drawing.
Upload a picture of your pencil drawing once it is done (whenever is fine) and then one of your final painting.
Remember to keep your pencil lines light so you can easily erase all of the lines that go to the vantage point. You can re-read the steps or stop and replay the videos as much as needed. I know this may feel challenging, but trust me, you'll thank me once perspective becomes second nature.