Making friends with perspective - part 2
In today's lesson, we give more tips and tricks about perspective as it relates to drawing a circle in perspective. A circle drawn in perspective (tilted forward or backward) is called an ellipse. We will draw a cake stand with multiple levels of ellipses together in this lesson.
|
Drawing a cake on a cake stand in perspective.
Remember that the horizon line is a continuous line where the sky meets the land or sea. It changes based on our view. It also serves as your eye level. In our case we are looking down on the cake so we want our cake to be below the horizon line. It may take a little experimentation to get it positioned how you want it. • Everything above the horizon line we'll be looking up at. Everything below it, we'll be looking slightly down at. • Next put in your 2 vantage points. This is where the lines converge. You can have 1, 2 or 3 vantage points. The 3rd vantage point is typically below the horizon line just to give a more extreme perspective. |
|
* Click on the videos to see them enlarged
|
• Put down your vertical lines below the horizon line to establish the corner and sides of your cube.
• Draw the cube (you may have to experiment a little) • Draw in those middle tic marks from the center of each side and throw those ellipses. • Find the midpoint of your ellipse and make a smaller one the size of the cake stand. To do this, measure in about .50" in on all sides. • Put in a new, smaller ellipses. |
|
|
|
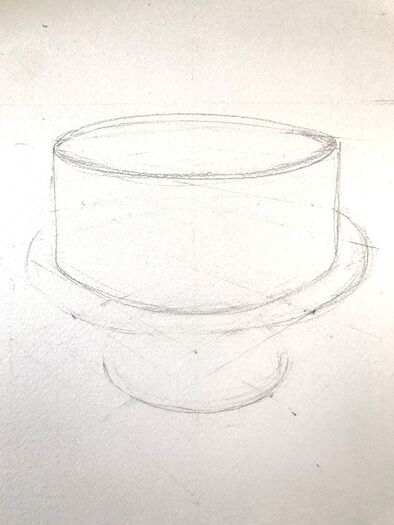
• Estimate where the different levels will be of your object (in our case, the cake stand footer is the floor of the cube, the top surface of the cake is the ceiling of the cube, so we need to add a "middle floor" where the bottom of the cake will rest on the plate).
• Draw the cake sitting on a plate. • Just as we came in a bit to draw the bottom of the cake stand, you'll have to come out about .50" on the "middle floor" to extend the plate beyond the cake. |
Clean Up and Homework
- Remove all of the extraneous lines.
- Make sure that your top and bottom ellipses are smooth at the corners.
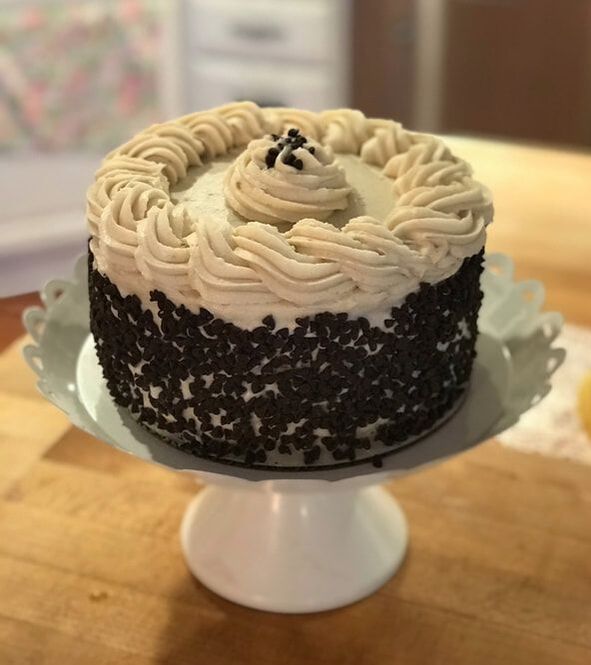
- Draw the cake on a stand and paint it from the reference photo. You can modify it or simplify it as much or as little as you would like.
- The key is to get your perspective correct in your drawing.
- Upload a picture of your pencil drawing once it is done (whenever is fine) and then one of your final painting.
- Remember to keep your pencil lines light so you can easily erase all of the lines that go to the vantage point. You can always re-read the steps or stop and replay the videos as much as needed. Let me know if you have any questions or concerns.
Additional Tips
• You can use a sticky note or draw dots on your board/table for the vantage points.
• If the horizon line is at eye level you won't see the roof or into the bottom of the object.
• Draw lightly the boxes and lines so that you can erase the extra marks later if you want to.
• Doors and windows will follow the same rules that the walls of a building do.
• Come up with your light source and then be consistent about shading of the object.
Darkening the side away from the light source.
• Exaggerating the different shades helps. Also remember that objects cast shadows too.
For Your Homework
Extra Tip:
Will you ever have multiple vantage points ?
When including an object in your still life that is rotated at a different angle, such as stacked books. You start by loosely estimated a sketch of the rotated object. Next follow the angles/sides that you drew up to the horizon line. These intersections become your new extra vantage points. The key is to have all vantage points on the same horizon line so that they look like
they are being viewed from the same eye level.